How to Add Images to a GitHub README
I started building websites with AI and creating GitHub repositories, then ran into a practical problem: I needed images inside Markdown README files. I first tried Base64 images because they kept everything in one file, but they became difficult to maintain. That experience taught me why a simple hosted image URL is usually the better choice.
How GitHub README Images Work
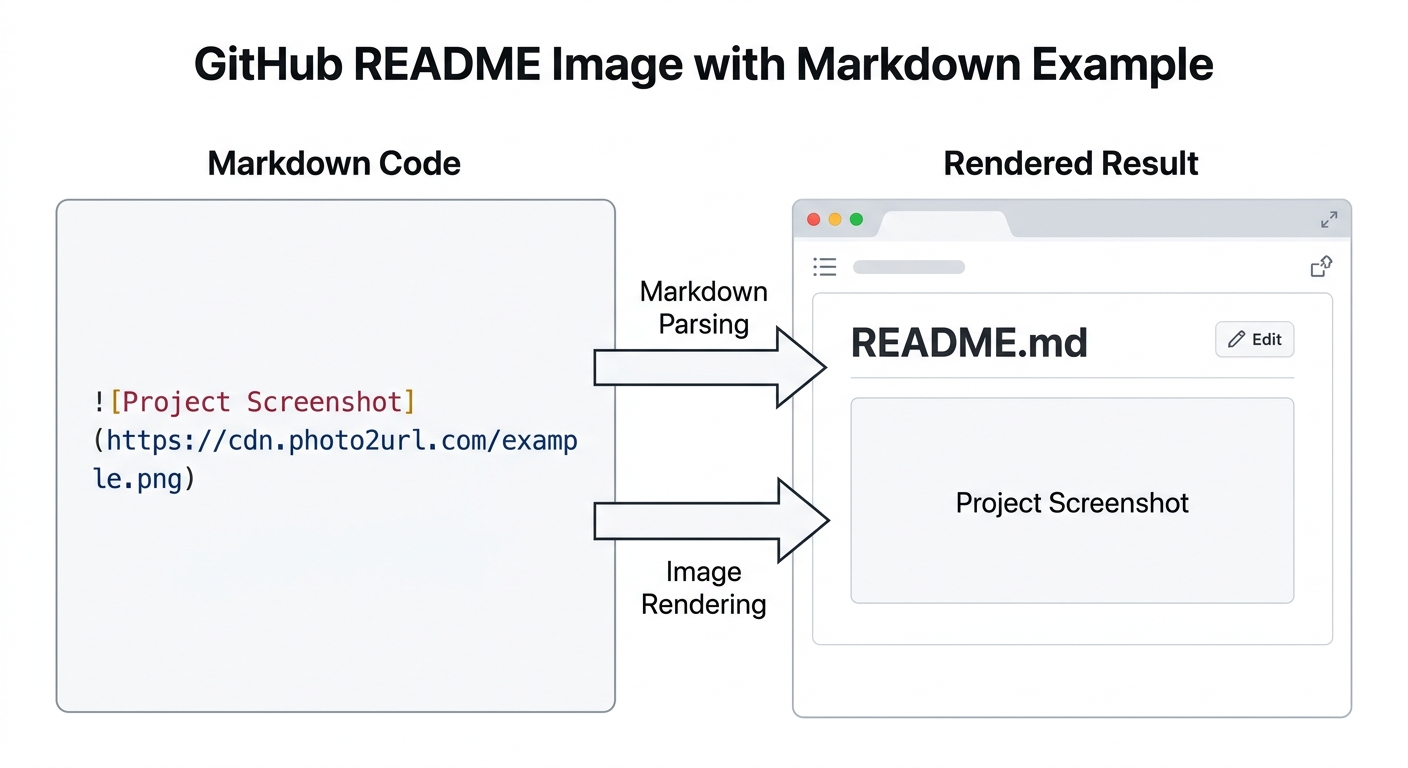
A README is normally a Markdown file. When GitHub displays it, the Markdown renderer turns image syntax into an image element. The renderer needs an address where it can fetch the picture: either a path to a file in the repository or a URL that returns the image resource.
In that example, the text in square brackets is the alternative description. The value in parentheses is the path or image URL. If the address does not return an image, GitHub shows a broken image or no picture at all.
Why Markdown Images Need URLs
Markdown is plain text, so it cannot contain a picture by itself. It contains a reference that the renderer follows. A local path such as /Users/you/Pictures/dashboard.png only points to a file on your computer, so it cannot help someone reading the README on GitHub.
There are two workable approaches. The image can live in the repository and be referenced with a relative path, or it can be hosted elsewhere and referenced with a complete image URL. Both give the renderer something it can resolve.
Option 1: Add a GitHub-Hosted Image
For screenshots, diagrams, and product images that belong with the project, keep the image in the repository. This is often the simplest GitHub README image workflow because the image and documentation version together.
my-project/
  README.md
  docs/
    images/
      dashboard.png
Reference the file relative to the README. When the README is at the repository root, the Markdown looks like this:
This approach keeps the asset available as long as the repository is available, and a pull request can show both the Markdown change and the image file together. Use clear file names and check capitalization because GitHub paths are case-sensitive.
GitHub's issue and pull request editors offer another way to create a hosted image reference. Drag an image into the editor or paste it from your clipboard. GitHub uploads the file and inserts Markdown containing a generated URL. Switch to preview mode to confirm that it renders, then copy the URL into the README.
Option 2: Use an External Image URL
An external image URL is useful when the picture should not be committed to the repository, when many repositories need the same asset, or when the image is uploaded by an automated tool. The URL must point to the image itself rather than an HTML page that merely contains it.
A page URL might return HTML with navigation, cookie prompts, or a viewer. A direct image URL returns image bytes with an image content type, which is what Markdown needs. Before committing the README, open the URL in a private browser window. If it displays on its own without a sign-in or gallery page, it is ready to test in Markdown.
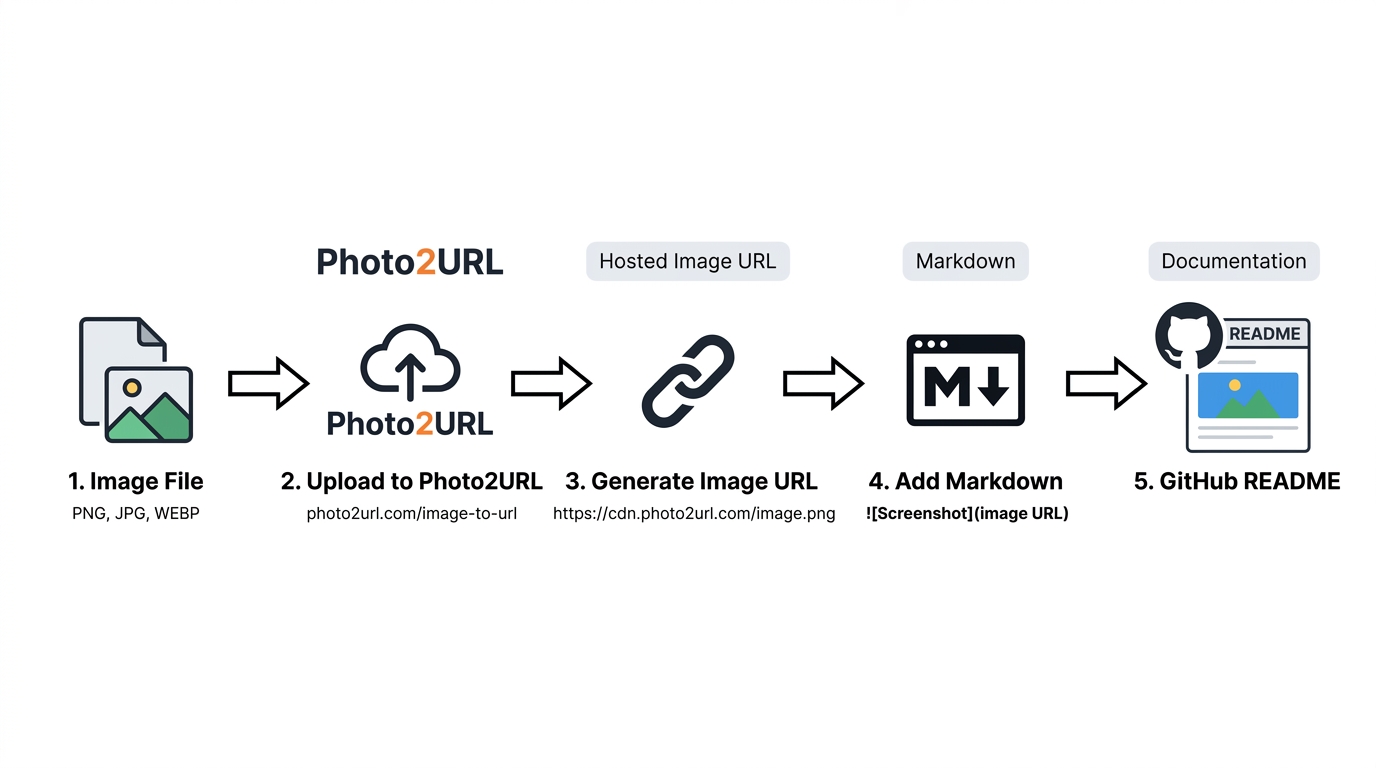
If the image is still on your computer, upload it with Photo2URL's Image to URL tool, copy the direct URL, and paste it between the parentheses. The result is the Markdown image URL that GitHub will fetch.
Why Base64 Images Are Usually Inconvenient
Base64 encodes image data as text and places it directly in a data URL. It can look appealing because the README no longer depends on another file:
In practice, that convenience is short-lived. A small screenshot can become thousands of characters in the Markdown file. The encoded data makes the README difficult to scan, review, and edit, and every replacement can create a large Git diff. It also duplicates the image payload wherever the Markdown is copied and prevents the repository from treating the image as a normal asset that can be optimized or cached independently.
GitHub support for data URLs can also vary, so a Base64 image that appears in one Markdown renderer is not guaranteed to work everywhere. For a README, a committed image file or a hosted direct URL is usually easier to maintain and understand.
How to Create an Image URL for a README
The exact steps depend on where you want the image to live, but the Markdown workflow is the same:
- Choose the image. Use a PNG for screenshots, JPEG for photographs, or WebP when you want efficient delivery.
- Host it. Commit it to the repository, upload it through a GitHub editor, or upload it to a direct-link image host.
- Copy the address. For a repository image, copy its relative path. For an external image, copy the direct image URL rather than a gallery or preview page.
- Add the Markdown. Place the path or URL inside the parentheses:
. - Preview the README. Confirm that the image loads, the alt text makes sense, and the file works on a narrow screen.
A Complete GitHub README Example
A project README can combine headings, badges, screenshots, and links without making the Markdown complicated:
# Dashboard
A small project for reviewing analytics.

[View the live demo](https://example.com/dashboard)
## Development
Run the development server with `npm run dev`.If the image should open another page when clicked, wrap the Markdown image inside a Markdown link:
[](https://example.com/dashboard)That pattern follows the same distinction between the image source and the click destination explained in the image linking guide. Use it when the screenshot should lead to a demo, release, or documentation page.
Automating README Image URLs
If a build process generates screenshots or diagrams, an API can upload the asset and return a URL that the documentation step inserts into Markdown. Photo2URL's developer API supports uploads, direct URLs, Markdown, and HTML output for that kind of workflow. Keep secrets out of public repositories and do not publish sensitive screenshots through a public image URL.
Troubleshooting a README Image
- The image renders locally but not on GitHub. Check the path against the repository structure and verify the file name and capitalization in GitHub.
- The image URL opens a webpage. Use the direct image resource URL instead of the page URL.
- The image disappears later. The external host may have deleted the file, expired the link, or changed its access rules.
- The image is too wide. Resize or crop it before committing it. For limited layout control, GitHub may accept an HTML image tag with a width attribute.
- The repository is becoming large. Compress images, avoid committing duplicate assets, and use an external host when the image does not belong in the repository.
Frequently Asked Questions
How do I add an image to GitHub README?
Commit the image to your repository and use , or upload the image somewhere public and replace the path with its direct image URL. GitHub previews the Markdown after you commit or edit the README.
Does GitHub README support images?
Yes. GitHub renders standard Markdown image syntax and also supports a limited subset of HTML. PNG, JPEG, GIF, WebP, and SVG files are common choices, although very large files and unsupported asset types can still cause rendering or performance problems.
Should I use Base64 images in Markdown?
Usually no. A data URL can turn a short Markdown image reference into thousands of characters, create noisy commits, and make the repository harder to maintain. A committed image file or a stable direct image URL is easier to review, replace, cache, and reuse.
How do I host images for GitHub README?
You can commit the file to the same repository, upload it through a GitHub issue or pull request editor, or use an external image host that provides a public direct URL. Choose based on whether the image belongs to the project and how long the README needs the link to remain available.
Need a README image URL?
Upload an image to get a direct URL plus copy-ready Markdown for your next GitHub README update.